Late Imperial Romans at the Worlds, 2014, Kobenz
This year “The Worlds” DBMM was restricted to Book 2 dates. My army was Late Imperial Roman, 407 AD, Western in Gaul. This date and location corresponds to the army Constantine III brought out of Britain, though I'm not sure how closely it corresponds to the composition he might have had.
CinC RLHS, 12 WbO (Goths) , 4 BdO, 4 BdX (Legionaries with heavy clubs), 2 RPsO (supporting Bd), 5 ILHS (Alan Mercenaries) - 28 ME
Sub RCvO, 6 RLHO, 3 RCvO, 3 RKnF, 2 RPsS – 24 ME
Sub RCvO, 5 RAxS (Auxilia Palatina), 5 RAxO (Border Auxilia), 4 RPsO (Supporting Auxilia), 1 RPsS, 2 RArtF – 20 ME
Army baggage 6 RBgeO – 12 ME
The general idea is for the CinC to have the high dice and do most of the fighting. The mounted command supports as best it can, but isn't strong enough to be the primary battle-winner. The auxilia command takes the low dice to hold a flank and can afford to lose all the half ME elements, while the general manoeuvres the artillery behind the rest of the army to pick on any suitable targets. The army has the antidote to everything*, but it can be difficult to coordinate all the different tactical elements. I had used it the previous week at BRITCON, where I had had a loss, three draws and two wins. Could I do any better here?
(* TBH it's not that good against Light Horse armies or huge irregular armies)
Game 1 versus Norbert Bausch, Early German, Cherusci
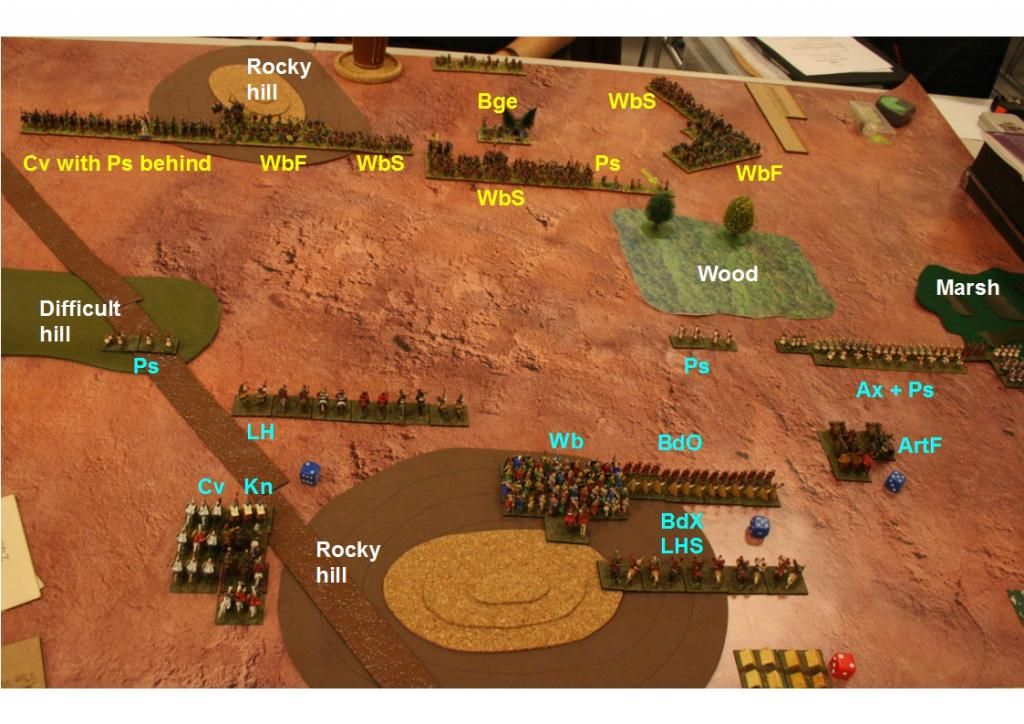
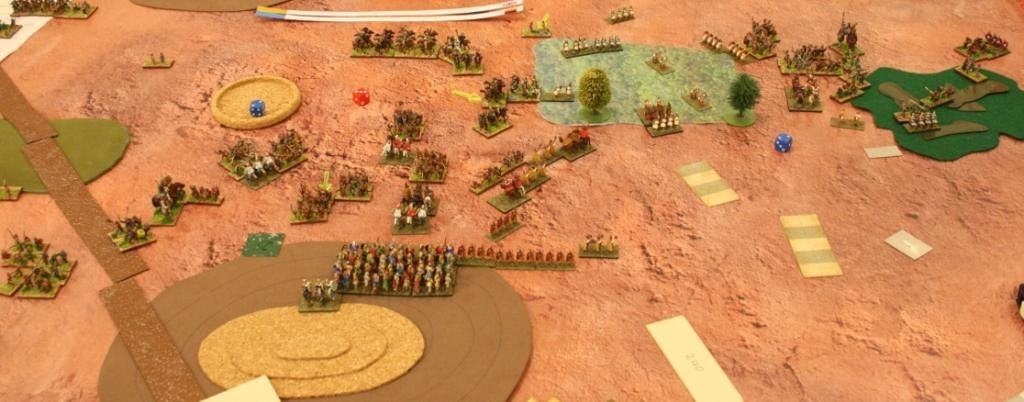
The Germans invaded and placed a rocky hill in the middle of each long table edge. I put down a steep hill, a marsh and a wood, which were spread out along the centreline with the aim of breaking up the enemy warband into manageable chunks that would expose their flanks as they came past the difficult going.
I deployed the mounted command on the left and CinC in the centre, mostly on the rocky hill. These two commands were between the steep hill and the wood. My Auxilia were on the right, mostly between the wood and the marsh, but partly behind the wood and in the marsh, which was next to the table edge. Norbert put a command of Wb(F) and (S) and one psiloi behind the wood, but angled to aim at the marsh. Most of the command was in column, Wb(S) at the back. A Chatti ally of Wb(S) with 1 cavalry was to the left of the wood with three psiloi behind the wood. The CinC's command was to the left of this, Wb(S) next to the Chatti, then Wb(F), then a line of Cavalry with psiloi behind, all facing the steep hill. I came to the conclusion that I would have to take the wood and use it to assail the flanks of the Sub and Ally commands and then finish off the ally using my mounted troops from the front and legionaries from the flank once it got past the wood. The Auxilia command would be busy so I gave them the high PIP dice, CinC the middle and Cavalry the low.
On my first bound I moved the Auxilia in column into the wood, whereupon Norbert revealed an ambush of 8 Wb(F). However, it was too close to the centre line so he took all the figures off and put them back in the box. I thought this was a harsh sanction, so called our illustrious umpire, Neil Fox, to come up with a more appropriate penalty. He said put them on the rear table edge behind the wood, which was the standard way of dealing with this situation in DBM. What Neil didn't know, and I only discovered a bit later, was that these warband were from the CinC's command and out of their command rectangle. If I had thought about the significance of this, I probably would have suggested to Norbert that he move them across so they were in the CinC's rectangle, but I didn't.
Issues with the ambush having been resolved, I began preparing the rest of the army to receive the Cherusci attack.
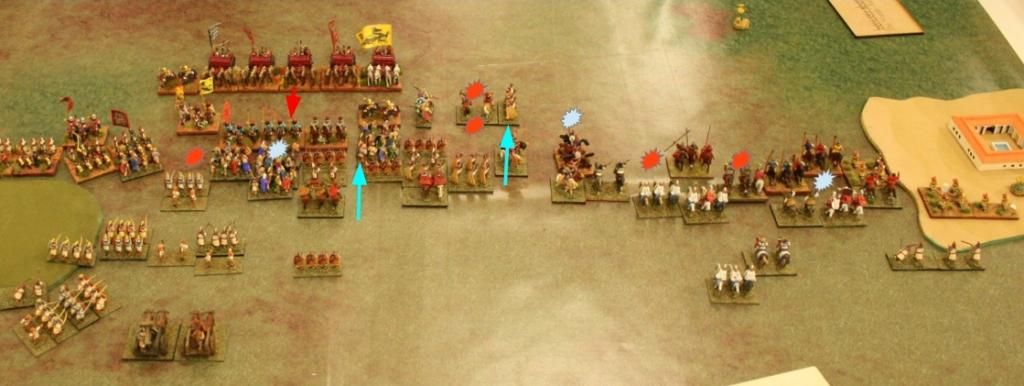
Norbert advanced with the CinC's and allied infantry, then moved his CinC's cavalry behind the ally. The subgeneral, with low PIPs, could only advance towards the marsh. The ambush party spontaneously advanced towards the wood.
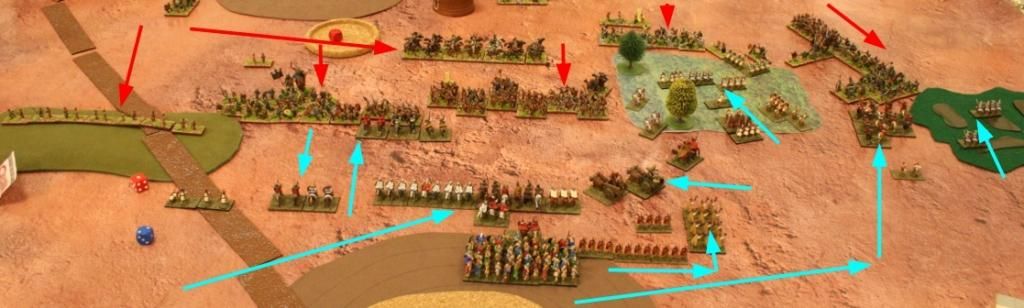
The battle near the marsh began with some desultory combat between the Alans, that had moved into the space where the auxilia had started, and the Cherusci warband, while some psiloi were engaged by Auxilia in the wood. My attempt to hold up the enemy CinC was only partially successful and cost some LH destroyed and spent. Some of the Chatti, however, outran the supporting cavalry and exposed their flank.
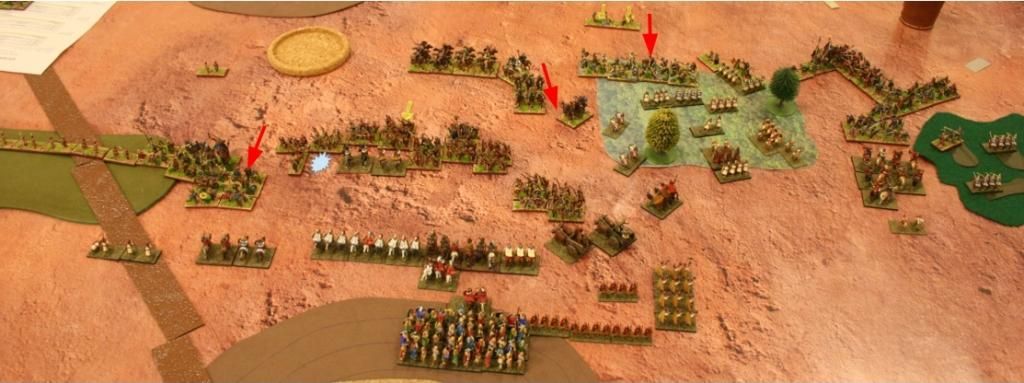
After that it was a case of both of us spending our PIPs on attacking as best we could in the melees occurring all over the table. The artillery managed to destroy one element of warband by shooting, then got charged down, along with an element of clubmen that I had helpfully moved into the zone of death. Most of the ambush party was eliminated when it charged into the wood, but this diverted my PIPs and troops from concentrating on the other two commands. Things got very messy in the area of the marsh and both sides suffered losses. The Roman heavy mounted, with the low PIP dice, were exchanging knights for warband, while the light horse and psiloi were gradually outflanked and destroyed, leading to the loss of that command. The Chatti allies were disheartened, but time ran out before I could break them. 11-14 in the German's favour.
Game 2 versus Carlos Duecker Benfer, Han Chinese
The Chinese invaded and the terrain was two woods on the left table edge, a rocky hill on my rear table edge, towards the left, with a difficult hill in front of it, a marsh in the middle of my rear table edge and a BUA half way along the right table edge. The battle was fought mostly in the open.
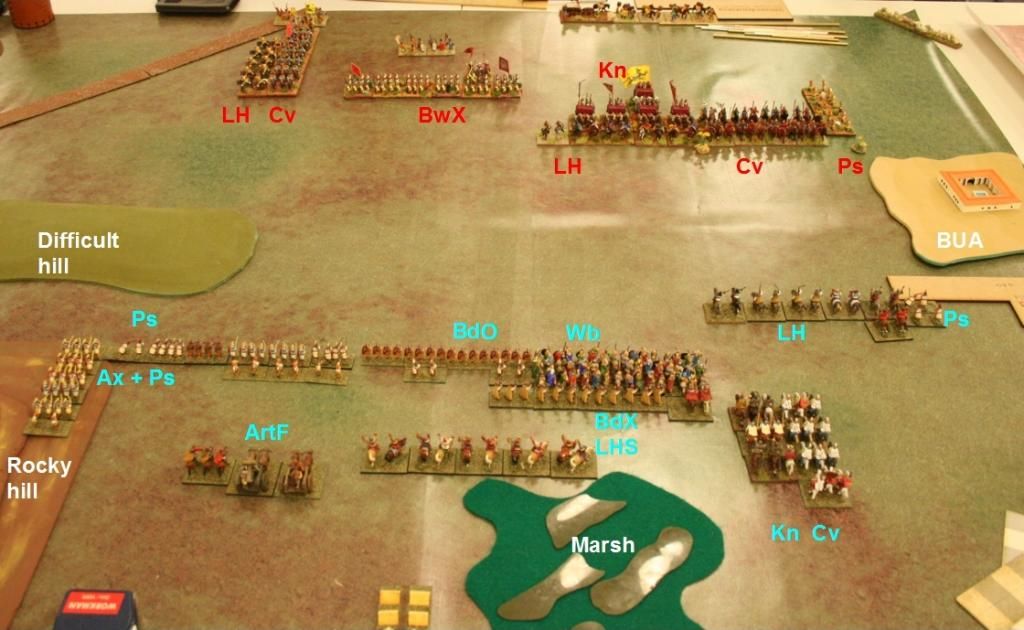
I deployed CinC in the centre, Cavalry on the right (next to the BUA) with the light horse in front and the auxilia on and near the hills. Carlos deployed double based BwX opposite my auxilia and positioned so they could advance past the difficult hill, cavalry and light horse in columns facing the hill, and a large command of cavalry, light horse, psiloi and knight chariots facing my warband and cavalry.
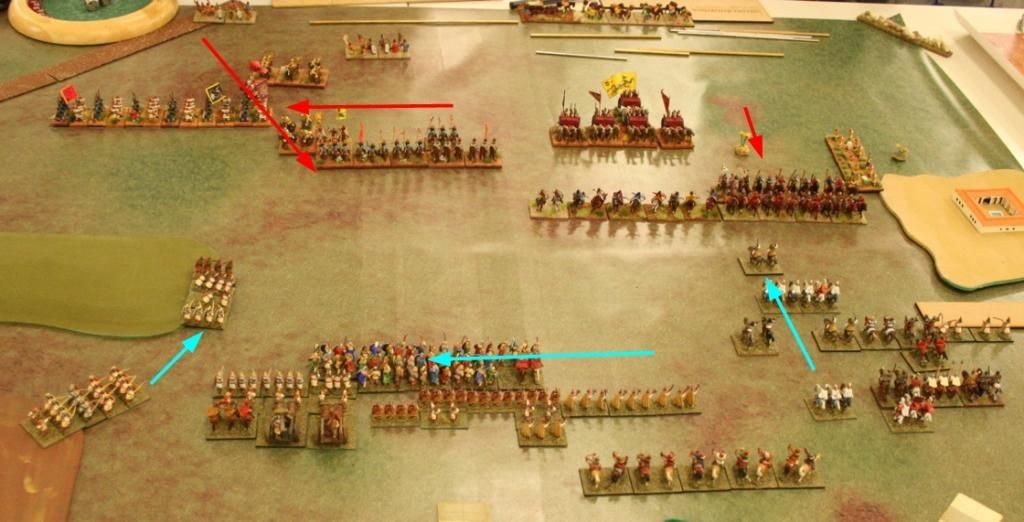
I started by moving the warband across to face the BwX. Carlos responded with three sixes for his PIPs, redeploying his BwX behind the difficult hill and replacing them with his mounted troops from behind the hill. Initial skirmishing near the BUA left my command broken up into a number of groups, but the Chinese had not advanced very far.
Despite the early loss of light horse, my mounted command gained the upper hand on the right, aided by the Alan superior light horse advancing to fight their fast Chinese opposite numbers. However, my first knight charge resulted in two knights recoiled and one destroyed. The Chinese chariots, rather than taking on the Alans backed up by the clubmen, moved to a safe position behind the other Chinese cavalry command. These cavalry and the warband advanced towards each other and if I remember correctly, the artillery did some damage with overhead shooting. The Auxilia occupied the end of the hill and the Chinese bowmen moved up to shoot them off it. The Chinese also brought some more cavalry out of ambush in the woods, but they never got close enough to affect the battle.
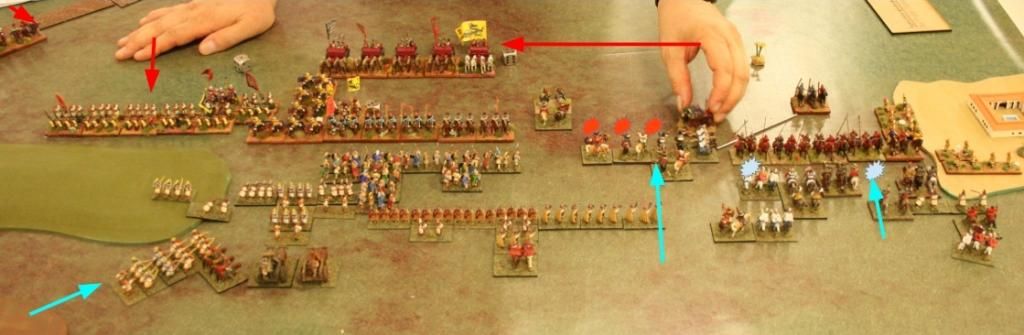
The sideways withdrawal of the Chinese knights left a big hole that the Alans could exploit. However, they made heavy weather of doing any further damage and the second of the Roman knights was destroyed. The last knight started killing things, however, and the warband managed to put to flight the Chinese cavalry on the left, albeit only temporarily.
The melees continued with casualties on both sides. Eventually the large Chinese command was disheartened and the Roman cavalry command was almost, but not quite, disheartened too. The Roman CinC's command had lost several elements, as had the Chinese second cavalry command, but time ran out before anything more could happen. 13-12 to the Romans.